Configure a Custom Linux Board
The customlinux board model supports boards like the Mediatek Genio 500 Pumpkin that run Linux operating systems and are not supported by other built-in Viam models.
To integrate a custom Linux board into your machine:
- Install
viam-serveron your machine. - Create a board definitions file, specifying the mapping between your board’s GPIO pins and connected hardware.
- Configure a
customlinuxboard on your machine, specifying the path to the definitions file in the board configuration.
Install viam-server
viam-server is distributed for Linux as an AppImage.
The AppImage is a single, self-contained binary that runs on 64-bit Linux systems running the aarch64 or x86_64 architectures, with no need to install any dependencies.
To install viam-server :
Go to the Viam app. Create an account if you haven’t already.
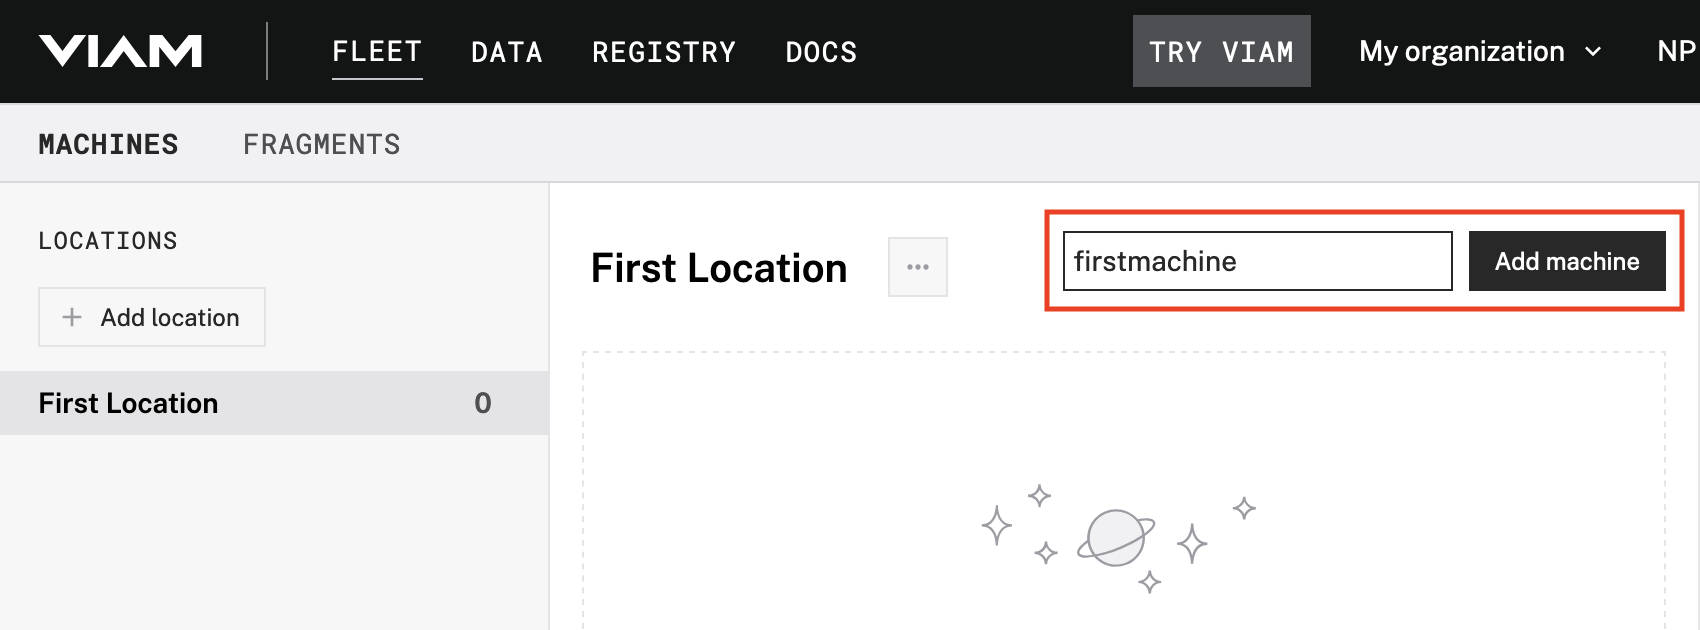
Add a new machine by providing a name in the New machine field and clicking Add machine:

Navigate to the CONFIGURE tab and find your machine’s card. An alert will be present directing you to Set up your machine part:

Click View setup instructions to open the setup instructions.
Select Linux / Aarch64.
Select your installation method:
viam-agent(recommended): installs viam-agent, which will automatically install (and update) viam-server and provide additional functionality such as provisioning and operating system update configuration.manual: installs onlyviam-serveron your machine.
Follow the instructions listed.
Once you have followed the steps on the setup instructions, wait for confirmation that your machine has successfully connected.
On your machine’s page on the Viam app, your machine will show that it’s Live.
By default, viam-server will start automatically when your system boots, but you can change this behavior if desired.
Create a board definitions file
Caution
While some lines on a board are attached to GPIO pins, some lines are attached to other board hardware.
It is important to carefully determine your line_number values.
Randomly entering numbers may result in hardware damage.
The board definitions file describes the location of each GPIO pin on the board so that viam-server can access the pins correctly.
On your customlinux board, create a JSON file in the directory of your choice with and provide the mappings between your GPIO pins and connected hardware.
Use the template and example below to populate the JSON file with a single key, "pins", whose value is a list of objects that each represent a pin on the board.
{
  "pins": [
    {
      "name": "<pin-name>",
      "device_name": "<gpio-device-name>",
      "line_number": <integer>,
      "pwm_chip_sysfs_dir": "<pwm-device-name>"
      "pwm_id": <integer>
    },
    ...
  ]
}
{
  "pins": [
    {
      "name": "3",
      "device_name": "gpiochip0",
      "line_number": 81,
      "pwm_id": -1
    },
    {
      "name": "5",
      "device_name": "gpiochip0",
      "line_number": 84,
      "pwm_id": -1
    },
    {
      "name": "7",
      "device_name": "gpiochip0",
      "line_number": 150,
      "pwm_id": -1
    },
    {
      "name": "11",
      "device_name": "gpiochip0",
      "line_number": 173,
      "pwm_id": -1
    },
    {
      "name": "13",
      "device_name": "gpiochip0",
      "line_number": 152,
      "pwm_id": -1
    },
    {
      "name": "15",
      "device_name": "gpiochip0",
      "line_number": 94,
      "pwm_id": -1
    },
    {
      "name": "19",
      "device_name": "gpiochip0",
      "line_number": 163,
      "pwm_id": -1
    },
    {
      "name": "21",
      "device_name": "gpiochip0",
      "line_number": 161,
      "pwm_id": -1
    },
    {
      "name": "23",
      "device_name": "gpiochip0",
      "line_number": 164,
      "pwm_id": -1
    },
    {
      "name": "27",
      "device_name": "gpiochip0",
      "line_number": 82,
      "pwm_id": -1
    },
    {
      "name": "29",
      "device_name": "gpiochip0",
      "line_number": 98,
      "pwm_id": -1
    },
    {
      "name": "31",
      "device_name": "gpiochip0",
      "line_number": 12,
      "pwm_id": -1
    },
    {
      "name": "33",
      "device_name": "gpiochip0",
      "line_number": 101,
      "pwm_id": -1
    },
    {
      "name": "35",
      "device_name": "gpiochip0",
      "line_number": 171,
      "pwm_id": -1
    },
    {
      "name": "37",
      "device_name": "gpiochip0",
      "line_number": 169,
      "pwm_id": -1
    },
    {
      "name": "8",
      "device_name": "gpiochip0",
      "line_number": 115,
      "pwm_id": -1
    },
    {
      "name": "10",
      "device_name": "gpiochip0",
      "line_number": 121,
      "pwm_id": -1
    },
    {
      "name": "12",
      "device_name": "gpiochip0",
      "line_number": 170,
      "pwm_id": -1
    },
    {
      "name": "16",
      "device_name": "gpiochip0",
      "line_number": 165,
      "pwm_id": -1
    },
    {
      "name": "18",
      "device_name": "gpiochip0",
      "line_number": 1,
      "pwm_id": -1
    },
    {
      "name": "22",
      "device_name": "gpiochip0",
      "line_number": 2,
      "pwm_id": -1
    },
    {
      "name": "24",
      "device_name": "gpiochip0",
      "line_number": 162,
      "pwm_id": -1
    },
    {
      "name": "26",
      "device_name": "gpiochip0",
      "line_number": 0,
      "pwm_id": -1
    },
    {
      "name": "28",
      "device_name": "gpiochip0",
      "line_number": 83,
      "pwm_id": -1
    },
    {
      "name": "32",
      "device_name": "gpiochip0",
      "line_number": 97,
      "pwm_id": -1
    },
    {
      "name": "36",
      "device_name": "gpiochip0",
      "line_number": 151,
      "pwm_id": -1
    },
    {
      "name": "38",
      "device_name": "gpiochip0",
      "line_number": 174,
      "pwm_id": -1
    },
    {
      "name": "40",
      "device_name": "gpiochip0",
      "line_number": 172,
      "pwm_id": -1
    }
  ]
}
The following parameters are available for each pin object:
| Name | Type | Required? | Description |
|---|---|---|---|
name | string | Required | The name of the pin. This can be anything you want but it is convenient to use the physical board pin number. Example: "3". |
device_name | string | Required | The name of the device in Example: "gpiochip0". |
line_number | integer | Required | The line on the chip that is attached to this pin. See GPIO info tips below. Example: 81. |
pwm_chip_sysfs_dir | string | Optional | Uniquely specifies which PWM device within sysfs this pin is connected to. See PWM info tips below. Example: 3290000.pwm. |
pwm_id | integer | Optional | The line number on the PWM chip. See PWM info tips below. Example: 0. |
Note
pwm_chip_sysfs_dir and pwm_id only apply to pins with hardware PWM supported and enabled.
If your board supports hardware PWM, you will need to enable it if it is not enabled by default.
This process depends on your specific board.
In the current version of viam-server, pins designated as hardware PWM pins can be used for PWM or GPIO output.
GPIO input will not work on these pins.
Tips for finding GPIO information
To see which chips exist and how many lines each chip has, run this command on your board:
sudo gpiodetect
Here is example output from this command on an Odroid C4:
gpiochip0 [aobus-banks] (16 lines)
gpiochip1 [periphs-banks] (86 lines)
This example output indicates that there are two GPIO chips on this board. One has 16 lines, numbered 0-15. The other has 86 lines, numbered 0-85.
To see info about every line on every GPIO chip, run this command:
sudo gpioinfo
Here is example output from the sudo gpioinfo command on an Odroid C4:
...
  line  62:      unnamed       unused   input  active-high
  line  63:      unnamed       unused   input  active-high
  line  64:     "PIN_27"       unused   input  active-high
  line  65:     "PIN_28"       unused   input  active-high
  line  66:     "PIN_16"       unused   input  active-high
  line  67:     "PIN_18"       unused   input  active-high
  line  68:     "PIN_22"       unused   input  active-high
...
In this example, the human-readable names such as "PIN_28" indicate which physical board pin each line is attached to.
However, these names are not standardized.
Some boards have pin names like "PH.03".
In either case, you need to look at the data sheet for your board and determine how the pin names map to the hardware.
Tips for finding PWM information
Run the following command and look for unique strings within each symlink.
ls -l /sys/class/pwm
Here is example output from this command on a Jetson Orin AGX:
total 0
lrwxrwxrwx 1 root root 0 Sep  8  2022 pwmchip0 -> ../../devices/3280000.pwm/pwm/pwmchip0
lrwxrwxrwx 1 root root 0 Sep  8  2022 pwmchip1 -> ../../devices/32a0000.pwm/pwm/pwmchip1
lrwxrwxrwx 1 root root 0 Sep  8  2022 pwmchip2 -> ../../devices/32c0000.pwm/pwm/pwmchip2
lrwxrwxrwx 1 root root 0 Sep  8  2022 pwmchip3 -> ../../devices/32f0000.pwm/pwm/pwmchip3
lrwxrwxrwx 1 root root 0 Sep  8  2022 pwmchip4 -> ../../devices/39c0000.tachometer/pwm/pwmchip4
Based on this example output, the values to use for pwm_chip_sysfs_dir are 328000.pwm, 32a0000.pwm, and so on.
Each of these directories contains a file named pwm_id value will be between 0 and one less than the number of lines.
For example, if the "4", then the valid pwm_id values are 0, 1, 2, and 3.
Determining which specific chip and line are attached to each pin depends on the board. Try looking at your board’s data sheet and cross-referencing with the output from the commands above.
Configure your board
Navigate to the CONFIGURE tab of your machine’s page in the Viam app.
Click the + icon next to your machine part in the left-hand menu and select Component.
Select the board type, then select the customlinux model.
Enter a name or use the suggested name for your customlinux board and click Create.

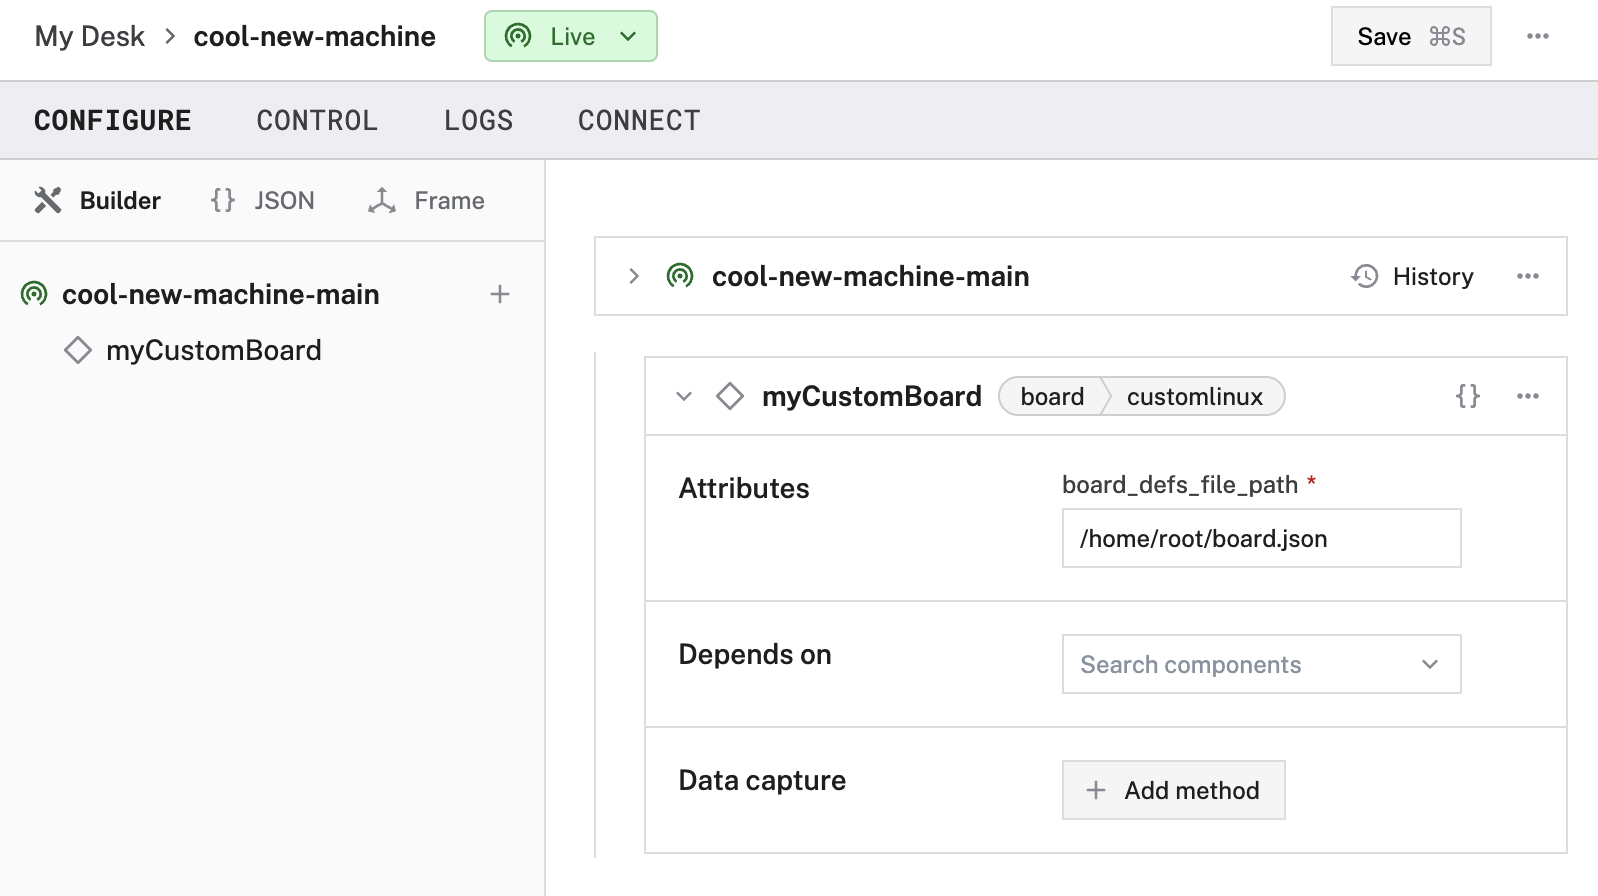
Edit the file path to use your board definitions file.
{
  "components": [
    {
      "name": "<your-customlinux-board>",
      "model": "customlinux",
      "type": "board",
      "namespace": "rdk",
      "attributes": {
        "board_defs_file_path": "<file_path>"
      },
      "depends_on": []
    }
  ]
}
{
  "components": [
    {
      "name": "myCustomBoard",
      "model": "customlinux",
      "type": "board",
      "namespace": "rdk",
      "attributes": {
        "board_defs_file_path": "/home/root/board.json"
      },
      "depends_on": []
    }
  ]
}
The following attributes are available for customlinux boards:
| Name | Type | Required? | Description |
|---|---|---|---|
board_defs_file_path | string | Required | The path to the pin mappings. See Create a board definitions file. |
Have questions, or want to meet other people working on robots? Join our Community Discord.
If you notice any issues with the documentation, feel free to file an issue or edit this file.
Was this page helpful?
Glad to hear it! If you have any other feedback please let us know:
We're sorry about that. To help us improve, please tell us what we can do better:
Thank you!